Thermomix Rezepte: 10 Delicious Dishes You’ll Crave
Are you searching for effortless and incredibly tasty thermomix rezepte? This collection will become your new go-to for quick and satisfying meals. Are you tired of spending hours in the kitchen after a long day? Imagine creating restaurant-quality dishes with minimal effort, thanks to your Thermomix.
Picture this: the aroma of freshly baked bread fills your kitchen, a creamy risotto simmers to perfection, or a vibrant soup bursts with flavor. The Thermomix makes all of this possible, offering a world of culinary possibilities at your fingertips. As a result, get ready to discover how easy and enjoyable cooking can be with these amazing recipes.
Health Benefits:
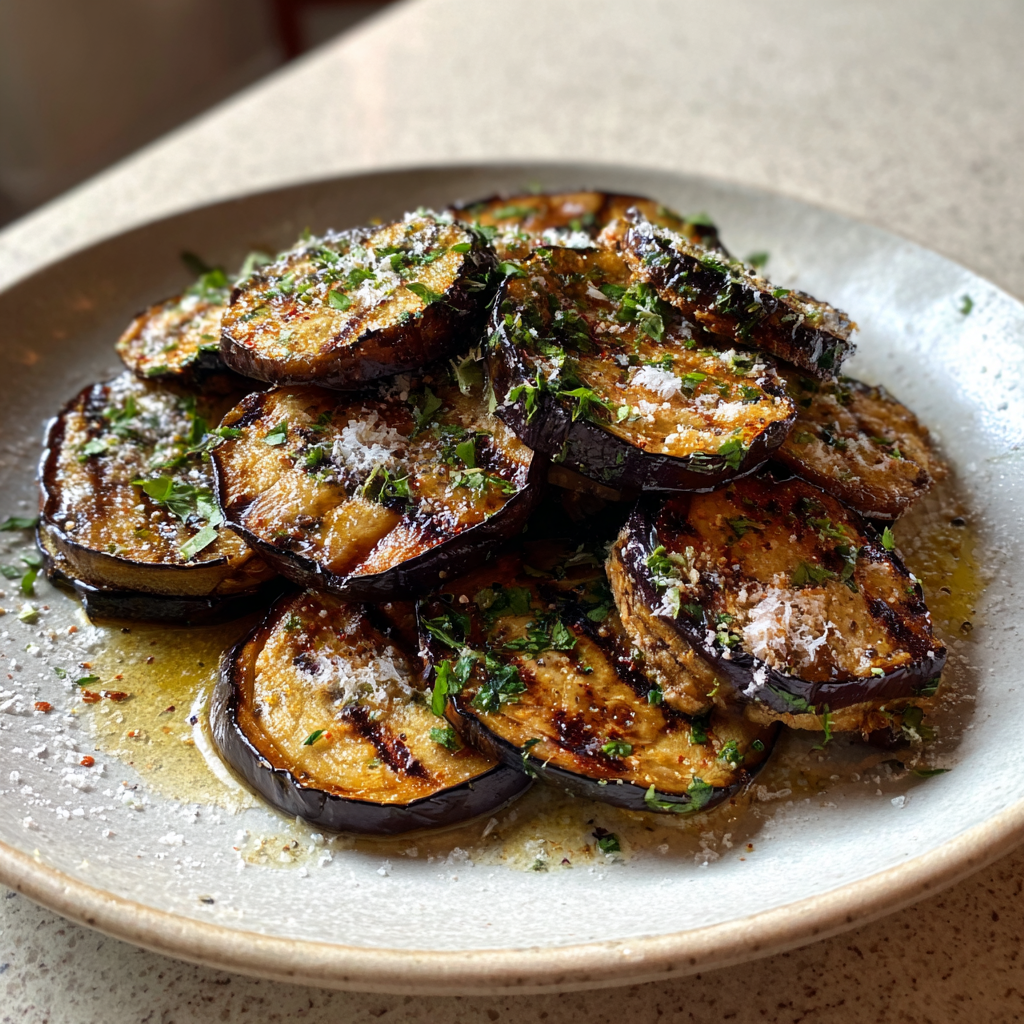
Using fresh ingredients in your thermomix rezepte offers significant health advantages. For example, vegetables are packed with essential nutrients that support overall well-being. Vitamin C, found abundantly in bell peppers and tomatoes, boosts the immune system. Moreover, leafy greens like spinach provide Iron, vital for energy production and preventing anemia.
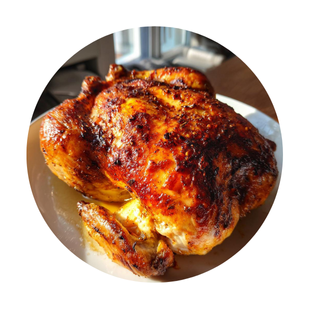
Lean proteins, such as chicken or fish, are crucial for muscle building and repair. These proteins are excellent sources of essential amino acids. In addition, incorporating healthy fats from olive oil or avocados contributes to heart health. These fats are rich in Omega-3 fatty acids, known for their anti-inflammatory properties and benefits for brain function.
Whole grains, like quinoa or brown rice, offer sustained energy and fiber. Fiber aids in digestion and helps regulate blood sugar levels. Best of all, using a Thermomix allows you to control the ingredients and avoid processed foods, reducing your intake of unhealthy additives and preservatives. A surprising health fact: homemade tomato sauce, prepared in your Thermomix, can have a higher concentration of lycopene (a powerful antioxidant) than store-bought versions due to the cooking process.
Why This Recipe Collection:
This specific collection of thermomix rezepte is designed to be both accessible and impressive. These recipes are carefully curated to showcase the versatility of the Thermomix. Furthermore, they offer options for various dietary needs and preferences. Whether you’re a beginner or an experienced cook, you will find something to love in this selection.
These recipes have been tested and perfected by families. They are guaranteed to deliver consistent results. In addition, they are ideal for busy weeknights, meal prep weekends, or even special occasions when you want to impress your guests without spending hours in the kitchen. These dishes are not only delicious but also relatively quick to prepare, making them a practical choice for modern lifestyles.
Quick Summary:
These thermomix rezepte require a prep time of 10-20 minutes and a cook time of 20-40 minutes, serving 4-6 people. The skill level is beginner to intermediate. They are perfect for weeknight dinners, meal prep, and impressing guests. [INTERNAL_LINK_1]
What are Thermomix Rezepte?
Thermomix rezepte are recipes specifically designed for use with the Thermomix, a multi-functional kitchen appliance. These recipes leverage the Thermomix’s capabilities to chop, blend, cook, and stir ingredients efficiently. They range from simple everyday meals to more elaborate dishes, making it easier to prepare a wide variety of foods.
Why You Will Love This Recipe
- Saves you time and effort in the kitchen.
- Allows you to create restaurant-quality meals at home.
- Provides consistent and reliable results every time.
- Offers a wide variety of dishes to suit all tastes.
- Helps you eat healthier by controlling ingredients.
Ingredients You Need
- Fresh Vegetables: Essential for vitamins, minerals, and flavor.
- Lean Protein (Chicken, Fish, Tofu): Provides essential amino acids.
- Herbs and Spices: Adds depth and complexity to the flavors.
- Olive Oil: A healthy fat source for cooking and flavor.
- Broth (Vegetable, Chicken): Forms the base of soups and sauces.
- Grains (Rice, Quinoa): Adds texture and nutritional value.
How to Make Thermomix Rezepte Step by Step
- Prepare Ingredients: Chop vegetables and measure out all ingredients according to the specific recipe.
- Sauté Aromatics: Add olive oil and aromatics (like garlic and onions) to the Thermomix bowl. Sauté until fragrant.
- Add Main Ingredients: Add the main ingredients such as vegetables, protein, or grains to the bowl.
- Add Liquid: Pour in broth, water, or sauce as specified in the recipe.
- Cook: Set the Thermomix to the appropriate temperature and time. Allow it to cook, stirring occasionally or continuously as needed.
Pro Tip: Always check the consistency and seasoning towards the end of the cooking time and adjust as necessary. This ensures the flavors are balanced and the dish is cooked to your liking.
- Serve: Once cooked, garnish with fresh herbs and serve immediately.
Expert Tips for Best Results
- Always use fresh, high-quality ingredients for the best flavor.
- Adjust seasoning to your personal preference. Taste and add more salt, pepper, or spices as needed.
- Don’t overcrowd the Thermomix bowl. Work in batches if necessary.
- Follow the recipe instructions carefully for optimal results.
- Use the Thermomix’s preset functions for common tasks like chopping and blending to save time.
- Clean the Thermomix bowl immediately after use to prevent food from sticking.
- Experiment with different herbs and spices to customize your dishes.
Variations and Substitutions
- Vegetarian: Substitute meat with tofu, lentils, or chickpeas.
- Gluten-Free: Use gluten-free grains like quinoa or rice and gluten-free soy sauce.
- Spicy: Add chili flakes, jalapeños, or a dash of hot sauce for extra heat.
- Regional: Adapt recipes to include local ingredients and flavors. For example, add chorizo to a Spanish-style stew.
How to Serve and Store
Serving Suggestions: Serve your thermomix rezepte immediately after cooking for the best flavor and texture. Garnish with fresh herbs, a drizzle of olive oil, or a sprinkle of cheese. Pair with a side salad, crusty bread, or a complementary side dish.
Storage: Store leftovers in an airtight container in the refrigerator for up to 3 days.
Freezing: Many thermomix rezepte freeze well. Allow the dish to cool completely before transferring it to a freezer-safe container. Freeze for up to 2 months.
Reheating: Reheat in the microwave or on the stovetop until heated through. Add a little broth or water if needed to prevent drying out.
Frequently Asked Questions
Can I use frozen vegetables in Thermomix recipes?
Yes, you can use frozen vegetables. However, fresh vegetables generally provide better flavor and texture. Adjust cooking times accordingly.
What if I don’t have all the ingredients listed?
It depends on the ingredient. You can often substitute similar ingredients. However, the final result may vary slightly. [INTERNAL_LINK_2]
How do I adjust a recipe for fewer servings?
Simply halve or quarter the ingredient amounts, keeping the cooking time the same. Monitor the dish closely to prevent overcooking.
Can I use the Thermomix for baking?
Yes, the Thermomix is excellent for baking. It can mix dough, knead bread, and even make pastry with ease.
How do I clean my Thermomix?
Most parts are dishwasher safe. For the bowl, add water and a drop of dish soap. Then run the pre-clean function.
What is the best way to store herbs?
Store fresh herbs in the refrigerator. Wrap them in a damp paper towel and place them in a plastic bag or container.
In conclusion, these thermomix rezepte offer a convenient and delicious way to enjoy homemade meals. They save time and ensure healthy eating habits. Try this recipe collection today and leave a comment below!
Print
Thermomix Rezepte: 10 Delicious Dishes You’ll Crave
Description
Dieses Toffee-Apfel-Rezept ergibt eine perfekte, glänzende, hart-knackige Zuckerglasur, die beim ersten Biss sauber zerbricht – jedes Mal. Hergestellt mit nur 5 Zutaten aus dem Vorratsschrank und in 30 Minuten fertig, bringen diese klassischen hausgemachten Toffee-Äpfel jede Karnevals- und Halloween-Erinnerung zurück, die Sie haben. Keine klebrige Glasur, kein trübes Finish, kein Rätselraten – nur das echte Produkt, direkt in Ihrer Küche hergestellt. Das Geheimnis ist eine Zahl: 149°C. Erreichen Sie diese Temperatur und Sie können nicht scheitern.
Ingredients
- 6 mittelgroße, feste Äpfel – Granny Smith (säuerlich) oder Fuji (süß) dringend empfohlen
- 400 g Kristallzucker
- 120 ml heller Maissirup
- 180 ml Wasser
- 1/2 Teelöffel rote Gelfarbstoff (Gel gibt eine tiefere Farbe als Flüssigkeit)
- 1/2 Teelöffel Zimt-Extrakt oder Aromaöl (optional)
- 6 Holzstiele für Toffee-Äpfel oder stabile Lutscherstiele
- Antihaft-Kochspray
- Backpapier oder Silikon-Backmatte
Instructions
- Richten Sie Ihren Arbeitsbereich ein, bevor Sie beginnen: Legen Sie ein Backblech mit Backpapier aus und sprühen Sie es leicht mit Antihaft-Kochspray ein. Halten Sie Ihre Äpfel am Stiel bereit und in Reichweite. Sobald der Zucker die Temperatur erreicht hat, müssen Sie schnell handeln – Vorbereitung ist alles.
- Entfernen Sie jegliches Wachs von Ihren Äpfeln. Gekaufte Äpfel haben eine lebensmittelechte Wachsbeschichtung, die verhindert, dass das Toffee daran haftet, und Blasen verursacht. Tauchen Sie jeden Apfel 5 Sekunden lang in kochendes Wasser und schrubben Sie ihn dann mit einem rauen Küchentuch trocken. Stecken Sie einen Holzstiel fest in das Stielende jedes Apfels und schieben Sie ihn mindestens bis zur Hälfte durch. Legen Sie ihn auf Ihr vorbereitetes Backblech.
- In einem mittelgroßen Topf mit schwerem Boden Zucker, Maissirup und Wasser vermischen. Vorsichtig umrühren, bis der Zucker angefeuchtet ist. Befestigen Sie ein Zuckerthermometer an der Seite des Topfes und stellen Sie sicher, dass die Spitze in die Mischung eingetaucht ist, aber nicht den Boden des Topfes berührt – eine ungenaue Messung ruiniert die Glasur.
- Den Topf bei mittlerer bis hoher Hitze auf den Herd stellen. Die Mischung unter ständigem Rühren zum Kochen bringen. Sobald die Mischung kocht, mit einem feuchten Backpinsel Zuckerkristalle von den Seiten des Topfes wischen – alle Kristalle, die wieder hineinfallen, können dazu führen, dass die gesamte Charge kristallisiert.
- Weiterkochen, ohne zu rühren, bis das Zuckerthermometer zwischen 149°C und 154°C anzeigt – dies ist das Hart-Knack-Stadium. Dies dauert etwa 15 bis 20 Minuten. Die Temperatur steigt zuerst langsam an und beschleunigt sich dann gegen Ende dramatisch. Verlassen Sie den Herd in den letzten 5 Minuten nicht.
- Nehmen Sie den Topf sofort vom Herd, sobald er 149°C erreicht hat. Den Gelfarbstoff und den Zimtextrakt, falls verwendet, einrühren. Nicht zu stark rühren – ein paar sanfte Umdrehungen genügen. Nun warten. Lassen Sie alle Blasen vollständig abklingen, etwa 1 bis 2 Minuten. Das Eintauchen in einen sprudelnden Sirup hinterlässt eine strukturierte, ungleichmäßige Glasur auf Ihren Äpfeln.
- Neigen Sie den Topf zu einer Seite, so dass sich der Sirup tief in einer Ecke sammelt – dies erleichtert die vollständige Abdeckung. Arbeiten Sie einen Apfel nach dem anderen und tauchen und drehen Sie jeden Apfel, um ihn vollständig zu bedecken, und lassen Sie den Überschuss 3 bis 4 Sekunden lang zurück in den Topf tropfen. Legen Sie jeden überzogenen Apfel mit dem Stiel nach oben auf das vorbereitete Backblech. Berühren oder bewegen Sie die Äpfel nicht, während sie fest werden. Lassen Sie sie vor dem Servieren mindestens 20 Minuten lang vollständig bei Raumtemperatur abkühlen. Die Glasur härtet zu einem glasartigen Finish aus.
Notes
- Warum ist meine Toffee-Apfel-Glasur klebrig oder zäh? Der Sirup hat nicht 149°C (Hart-Knack-Stadium) erreicht. Selbst ein paar Grad zu wenig – bei 143°C oder 146°C – lässt zu viel Wasser im Zucker zurück, was zu einer weichen, taffyartigen Textur anstelle einer harten Schale führt. Verwenden Sie immer ein kalibriertes Zuckerthermometer und nehmen Sie es nicht zu früh vom Herd.
- Warum ist meine Toffee-Apfel-Glasur trüb oder voller Blasen? Sie haben die Äpfel eingetaucht, bevor sich die Blasen nach dem Hinzufügen des Farbstoffs vollständig gesetzt haben. Warten Sie immer 1 bis 2 volle Minuten nach dem Entfernen vom Herd, bis die Oberfläche vollständig ruhig und glänzend ist, bevor Sie die Äpfel eintauchen.
- Warum haftet die Glasur nicht an meinem Apfel? Die Apfeloberfläche war noch wachsig oder leicht feucht. Wachs und Wasser verhindern beide die Zuckerhaftung. Entfernen Sie das Wachs mit einem 5-Sekunden-Tauchgang in kochendes Wasser und trocknen Sie es dann vor dem Eintauchen vollständig mit einem rauen Handtuch ab.
- Toffee-Äpfel niemals im Kühlschrank aufbewahren. Kalte Luft und Feuchtigkeit führen dazu, dass die harte Zuckerglasur Feuchtigkeit aufnimmt und klebrig wird. Bei Raumtemperatur, unbedeckt oder locker verpackt lagern und innerhalb von 1 bis 2 Tagen für die beste Textur verzehren.
- Wenn der Sirup beim Eintauchen zu stark eindickt, den Topf 20 bis 30 Sekunden lang bei schwacher Hitze auf den Herd stellen, um ihn zu lösen. Kein Wasser hinzufügen.
- Um Toffee-Äpfel ohne Maissirup herzustellen: Ersetzen Sie ihn durch 1 Teelöffel weißen Essig oder frischen Zitronensaft. Dies verhindert die Zuckerkristallisation auf die gleiche Weise wie Maissirup.
- Für Halloween-Toffee-Äpfel: Tauschen Sie den roten Gelfarbstoff gegen schwarzen, tiefvioletten oder waldgrünen Farbstoff aus, um ein gruseliges, dramatisches Finish zu erzielen. Schwarzer Farbstoff funktioniert am besten mit extra-schwarzem Gel, nicht mit normalem Schwarz.
- Bester Tag, um Toffee-Äpfel herzustellen: ein kühler, trockener Tag mit geringer Luftfeuchtigkeit. An feuchten Tagen bleibt die Glasur auch nach dem vollständigen Abkühlen klebrig. Vermeiden Sie es, diese an regnerischen Tagen oder in einer dampfenden Küche herzustellen.
- Die Apfelsorte ist wichtig: Granny Smith ergibt einen säuerlich-süßen Kontrast, der die Zuckerglasur durchbricht. Fuji und Honeycrisp sind süßer und ebenso fest. Vermeiden Sie weiche Sorten wie McIntosh oder Red Delicious – sie werden unter dem heißen Zucker matschig.
Nutrition
- Serving Size: 1 Toffee-Apfel
- Calories: 271
- Sugar: 65
- Sodium: 3
- Fat: 1
- Saturated Fat: 0
- Unsaturated Fat: 1
- Trans Fat: 0
- Carbohydrates: 71
- Fiber: 4
- Protein: 1
- Cholesterol: 0
Keywords: Toffee-Apfel-Rezept, hausgemachte Toffee-Äpfel, einfaches Toffee-Apfel-Rezept, Halloween-Toffee-Äpfel, Toffee-Apfel ohne Maissirup, Hart-Knack-Toffee-Äpfel, glänzende Toffee-Äpfel, Toffee-Äpfel von Grund auf, Herbst-Toffee-Apfel-Rezept, Karnevals-Toffee-Äpfel, wie man Toffee-Äpfel macht, Toffee-Apfel-Tipps, klebrige Toffee-Apfel-Reparatur, beste Äpfel für Toffee-Äpfel, thermomix rezepte